The night sky, a vast expanse dotted with the faint glimmer of distant stars, has captivated humanity for millennia. Yet, the celestial tapestry we see with our naked eyes is merely a fraction of the cosmos' true grandeur. Countless stars, nebulae, and galaxies remain hidden, veiled by distance and the limitations of our vision. What if you could unlock a hidden layer of cosmic wonders, transforming your view of the night sky from a scattering of pinpricks to a breathtaking panorama of celestial light? Night vision technology, often associated with military operations and wildlife observation, offers a surprisingly powerful tool for amateur astronomers, opening up a universe previously unseen. This article will serve as your guide to exploring the cosmos with night vision, explaining how this technology enhances astronomical observations, detailing the types of devices available, suggesting celestial targets, providing practical techniques, and guiding you towards choosing the right equipment for your stargazing adventures.
Many aspiring stargazers are quickly confronted with a frustrating obstacle: light pollution. The pervasive glow of artificial lights from cities and towns washes out the faint light from distant stars and celestial objects, drastically reducing the visibility of the night sky. Finding truly dark skies, free from light pollution, is becoming increasingly difficult, especially for those living in urban or suburban areas.
Even under pristine dark skies, the human eye has inherent limitations. Our eyes require time to adapt to darkness, a process known as dark adaptation. It typically takes 30 to 45 minutes for our pupils to fully dilate and for the chemical processes in our eyes to reach maximum sensitivity. Even then, our night vision remains limited in its ability to gather faint light and perceive subtle details.
Night vision devices dramatically overcome these limitations, offering several key advantages for stargazing. The core benefit is increased light gathering. Night vision amplifies faint light, revealing stars, nebulae, and other celestial objects that are completely invisible to the naked eye, even under dark skies. This amplification unveils a significantly richer and more detailed view of the cosmos.
Night vision also enhances contrast. The characteristic green image produced by most traditional night vision devices (due to the phosphor screen) can actually improve the contrast between faint objects and the background sky. This enhanced contrast makes it easier to discern subtle details and structures within nebulae and galaxies.
While night vision can't completely eliminate the effects of light pollution, it can help mitigate its impact. By amplifying the faint light from celestial objects, night vision can, to a degree, "cut through" the background glow of light pollution, making fainter objects more visible than they would be with the naked eye. It won't magically transform a light-polluted city sky into a pristine dark sky, but it can significantly improve the view.
Another significant advantage is the elimination of the long dark adaptation period. Night vision provides immediate enhanced vision, allowing you to start observing right away without the lengthy wait for your eyes to adjust. This is particularly beneficial for short observing sessions or when sharing the view with others.
Finally, night vision makes it easier to share the wonders of the night sky with others. Instead of struggling to describe what you're seeing through a telescope eyepiece, you can show them a real-time, amplified view of the cosmos. This makes night vision a fantastic tool for outreach and education.
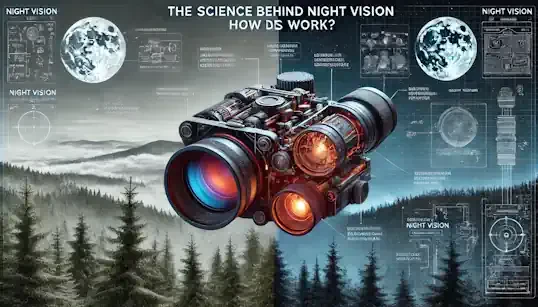
To appreciate how night vision enhances astronomical observations, it's helpful to understand the basic principles of its operation. There are two main types of night vision technology: image intensification and thermal imaging. For astronomy, image intensification is the relevant technology. Thermal imaging, which detects heat signatures, is not suitable for observing the extremely cold and distant objects in space.
Image intensification works by amplifying existing light, however faint. The process begins with light entering the device and striking a component called the photocathode. The photocathode is a light-sensitive surface that converts incoming photons (particles of light) into electrons. This is a fundamental principle of physics – light energy can be transformed into electrical energy.
The electrons generated by the photocathode then enter the heart of the image intensification process: the Microchannel Plate (MCP). The MCP is a thin, disc-shaped component containing millions of tiny, microscopic channels. When an electron enters one of these channels, it collides with the channel wall, causing the release of multiple additional electrons. This process repeats itself many times as the electrons cascade through the channel, resulting in a massive amplification of the original signal. A single photon can trigger the release of thousands of electrons.
These amplified electrons then strike a phosphor screen. Phosphors are materials that emit light when struck by electrons. As the electrons hit the phosphor screen, it glows, creating a visible image that corresponds to the original scene, but now significantly brighter. The green color commonly associated with night vision is due to the type of phosphor used, which is chosen for its efficiency and because the human eye is most sensitive to green light.
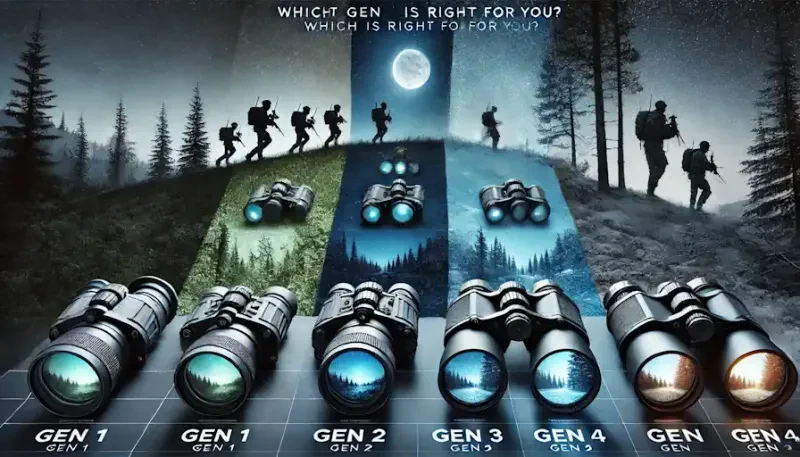
Over the years, image intensification technology has evolved through several "generations," each representing improvements in performance and capabilities. Generation 1 (Gen 1) is the oldest and most basic technology. While affordable, Gen 1 devices have significant limitations, including lower sensitivity, shorter range, image distortion, and a shorter lifespan. For serious astronomy, Gen 1 is generally not recommended.
Generation 2 (Gen 2) represents a substantial improvement over Gen 1, primarily due to the addition of the Microchannel Plate (MCP). Gen 2 devices offer significantly better light sensitivity, a longer range, reduced distortion, and a clearer image. While viable for some astronomical observations, Gen 2 still falls short of the performance offered by Gen 3.
Generation 3 (Gen 3) is the current gold standard for night vision astronomy. Gen 3 devices utilize a gallium arsenide (GaAs) photocathode, which is far more sensitive to faint light than the photocathodes used in previous generations. They also often incorporate an ion barrier film on the MCP, which extends the device's lifespan and further reduces image noise. The result is exceptional performance, with the highest sensitivity, longest range, sharpest image, and longest lifespan. For serious stargazers, Gen 3 is the recommended choice, although it comes with a higher price tag.
Digital night vision is a newer alternative. It uses a CMOS sensor, similar to what's in a digital camera, instead of an intensifier tube. Digital night vision devices often offer features not found in traditional night vision, such as image and video recording, adjustable gain and brightness, and sometimes even color displays. However, in very low-light conditions, high-end Gen 3 image intensifier tubes generally still outperform digital night vision in terms of raw sensitivity and image clarity. For dedicated astronomy use, traditional image intensifier tubes, especially Gen 3, usually have the edge. However digital night vision can still be a viable option, particularly if features such as recording are a high priority.
An important aspect to consider is magnification. Many night vision devices, particularly monoculars, are designed for 1x magnification. This means they provide a wide field of view, similar to your natural vision, which is ideal for scanning the sky and observing large-scale objects like the Milky Way. However, for closer views of smaller objects like nebulae and galaxies, you'll likely want to use a telescope in conjunction with your night vision device. There are methods to couple the two, which we'll discuss.
So, what celestial wonders can you expect to see with night vision? The transformation of the night sky is remarkable.
Stars and constellations, the basic building blocks of the night sky, become dramatically more abundant. Night vision reveals countless stars that are invisible to the naked eye, even under moderately light-polluted skies. Faint constellations that are difficult to trace with the unaided eye become much easier to identify, their patterns standing out clearly against the richer, star-filled background.
The Milky Way, our home galaxy, undergoes a breathtaking metamorphosis. Instead of a faint, hazy band across the sky, it becomes a brilliant, detailed river of light, teeming with stars. Dark nebulae and dust clouds, which appear as subtle obscurations to the naked eye, become more prominent and defined, adding depth and texture to the Milky Way's structure.
Nebulae, vast clouds of gas and dust where stars are born, are particularly enhanced by night vision. Emission nebulae, which glow with their own light due to ionized gases, become much brighter and more detailed. The Orion Nebula (M42), a popular target for amateur astronomers, reveals its intricate structure and vibrant colors (although the colors will appear as shades of green in traditional night vision). The Lagoon Nebula (M8) and the Swan Nebula (M17) are other excellent examples of nebulae that benefit greatly from night vision observation. Reflection nebulae, which shine by reflecting the light of nearby stars, also become more visible. Dark nebulae, which appear as silhouettes against a brighter background, are more easily discerned.
Star clusters, both open and globular, offer stunning views through night vision. Open clusters, which are relatively loose groupings of young stars, become more resolved, with individual stars standing out more clearly. Globular clusters, dense, spherical collections of hundreds of thousands or even millions of stars, are particularly impressive. Night vision enhances the view of their dense, bright cores, revealing a breathtaking swarm of stars.
Galaxies, while still challenging targets, are more easily detectable with night vision. Brighter galaxies, such as the Andromeda Galaxy (M31), become more apparent, even in light-polluted areas. However, it's important to manage expectations. Galaxies will generally still appear as faint, fuzzy patches of light, not the detailed spiral structures seen in long-exposure photographs. Night vision helps you find them more easily, but it won't magically transform them into high-resolution images.
Beyond these traditional astronomical targets, night vision excels at revealing fast-moving objects in the sky. Satellites, which appear as faint, moving points of light, become much easier to spot and track. Meteors, streaks of light caused by small particles burning up in the Earth's atmosphere, are also dramatically enhanced, allowing you to see many more "shooting stars" than you would with the naked eye.
To maximize your night vision stargazing experience, careful planning and technique are essential.
Choosing a dark location is still paramount, even with night vision. While night vision can mitigate the effects of light pollution to some extent, it's not a substitute for a truly dark sky. The darker your observing site, the better the view will be. Use light pollution maps (readily available online) to identify areas with lower levels of light pollution near you. Driving even a short distance away from city lights can make a significant difference.
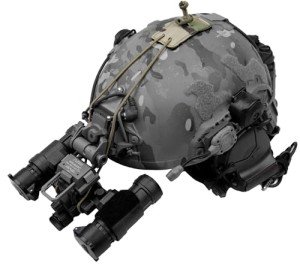
Setting up your equipment properly is also crucial. Night vision devices can be used in several ways: handheld, mounted on a tripod, or attached to a telescope. Handheld use is the simplest, allowing for quick scanning of the sky. However, for extended viewing or for observing fainter objects, a tripod is highly recommended. A stable platform eliminates hand shake, providing a much steadier and more comfortable viewing experience.
Using a telescope with night vision opens up a whole new realm of possibilities. There are two primary methods for coupling a night vision device to a telescope: afocal and prime focus.
The afocal method involves holding the night vision device (typically a monocular) up to the telescope's eyepiece. This is the simplest approach, requiring no specialized adapters. However, it can be challenging to maintain a steady alignment, and the resulting image quality may not be optimal.
The prime focus method involves removing the telescope's eyepiece and attaching the night vision device directly to the telescope's focuser, using appropriate adapters. This provides a more secure and stable connection, resulting in a sharper and brighter image. However, it requires specific adapters that are compatible with both your telescope and your night vision device.